1. Admin settings page
The Admin Settings page provides a centralized interface for managing various administrative tasks and configurations within the system.
Features:
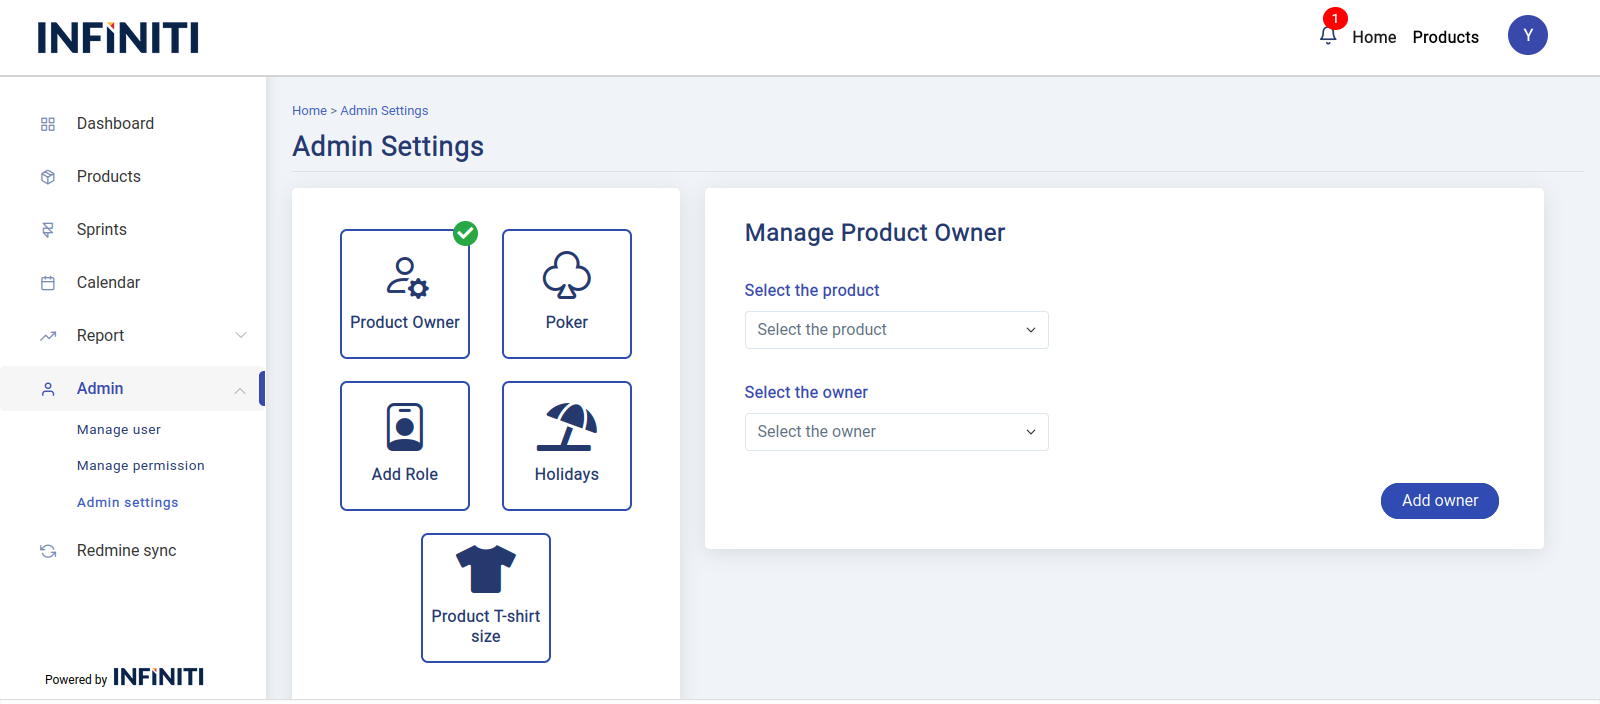
A) Product owner management
- Allows administrators to assign or change the product owner for each product. By selecting a product from the dropdown.
- This ensures that each product has a designated owner who is responsible for managing and overseeing its progress.
Functionality:
i. Select product
- The “Select Product” dropdown contains a list of all products available in the tool. These products are synced from the Redmine database.
- The administrator must first select a product from this dropdown. Only after a product is selected will the “Select Owner” dropdown become active.
ii. Select owner
- Once a product is selected, the system will automatically fetch and display a list of members associated with that product in the “Select Owner” dropdown.
- The administrator can then select a user from this list to assign them as the product owner.
- iii. Assign product owner
- After selecting both the product and the owner, click the “Add Owner” button to save the changes. This assigns the selected user as the product owner for the chosen product.
- Validation:
- Both the “Select Product” and “Select Owner” fields are required. The form cannot be submitted unless both fields are selected.
- If the “Select Product” field is empty, the “Select Owner” dropdown will remain inactive, preventing any owner selection.
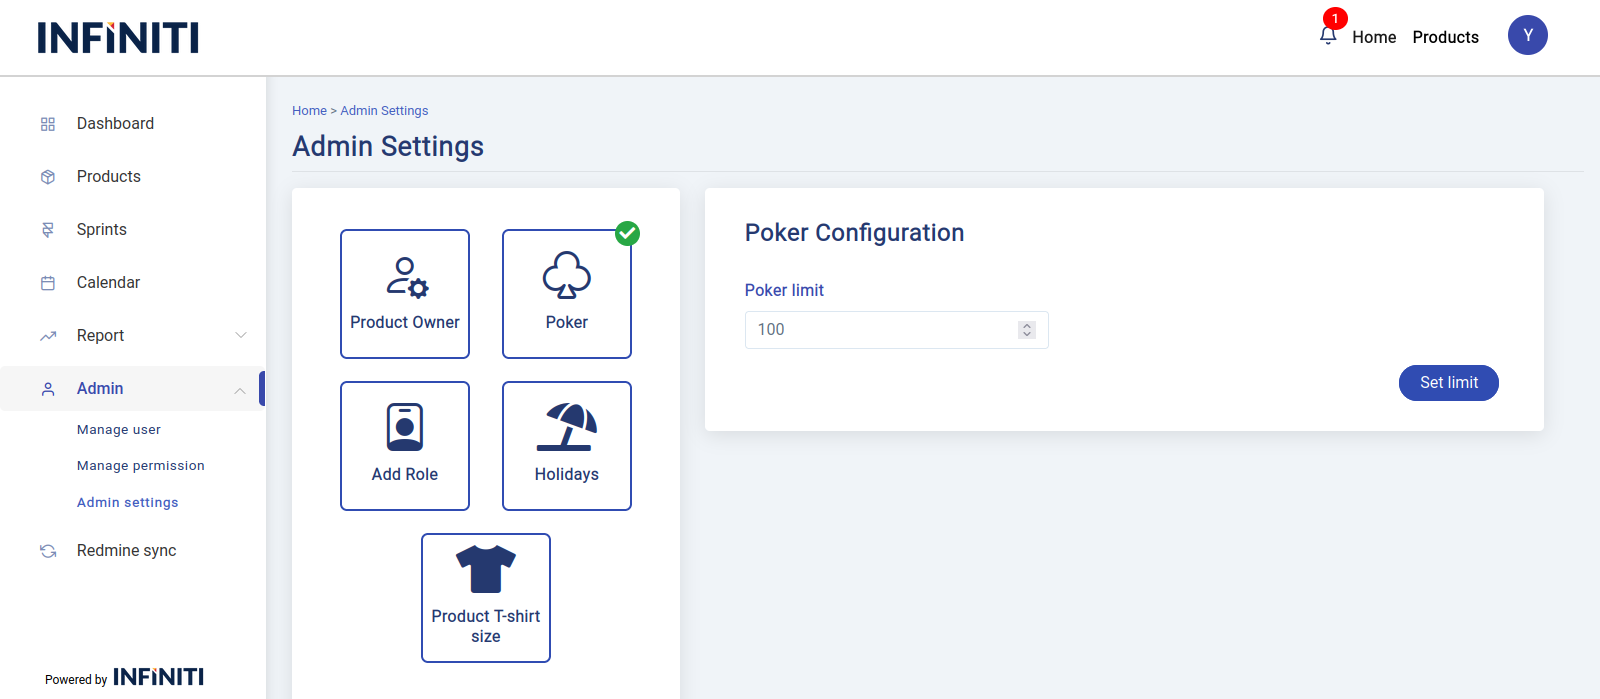
B) Poker value setting
- Facilitates the assignment of user story points based on the complexity of tasks.
- This feature helps teams estimate the difficulty of tasks by assigning “Poker” values, which represent the effort required to complete them, whether they are simple or complex.
Functionality:
i. Fetch existing poker value
- When the administrator clicks the “Poker” button, the system automatically fetches the current poker value from the database (if it exists) and displays it in the input box.
ii. Input poker value
- The input box only accepts positive numbers. The administrator can either update the existing value or enter a new value.
- Validation:
- The input box cannot be left empty. The form will not be submitted if the field is empty.
- Only positive numbers are allowed in the input box. Any other input will be rejected.
C) Add or delete roles
- The Add or Delete Roles feature allows administrators to manage roles within the system by adding new roles or removing existing ones.
- This functionality helps in customizing user access and permissions according to the organization’s needs.
- Adding a role page view
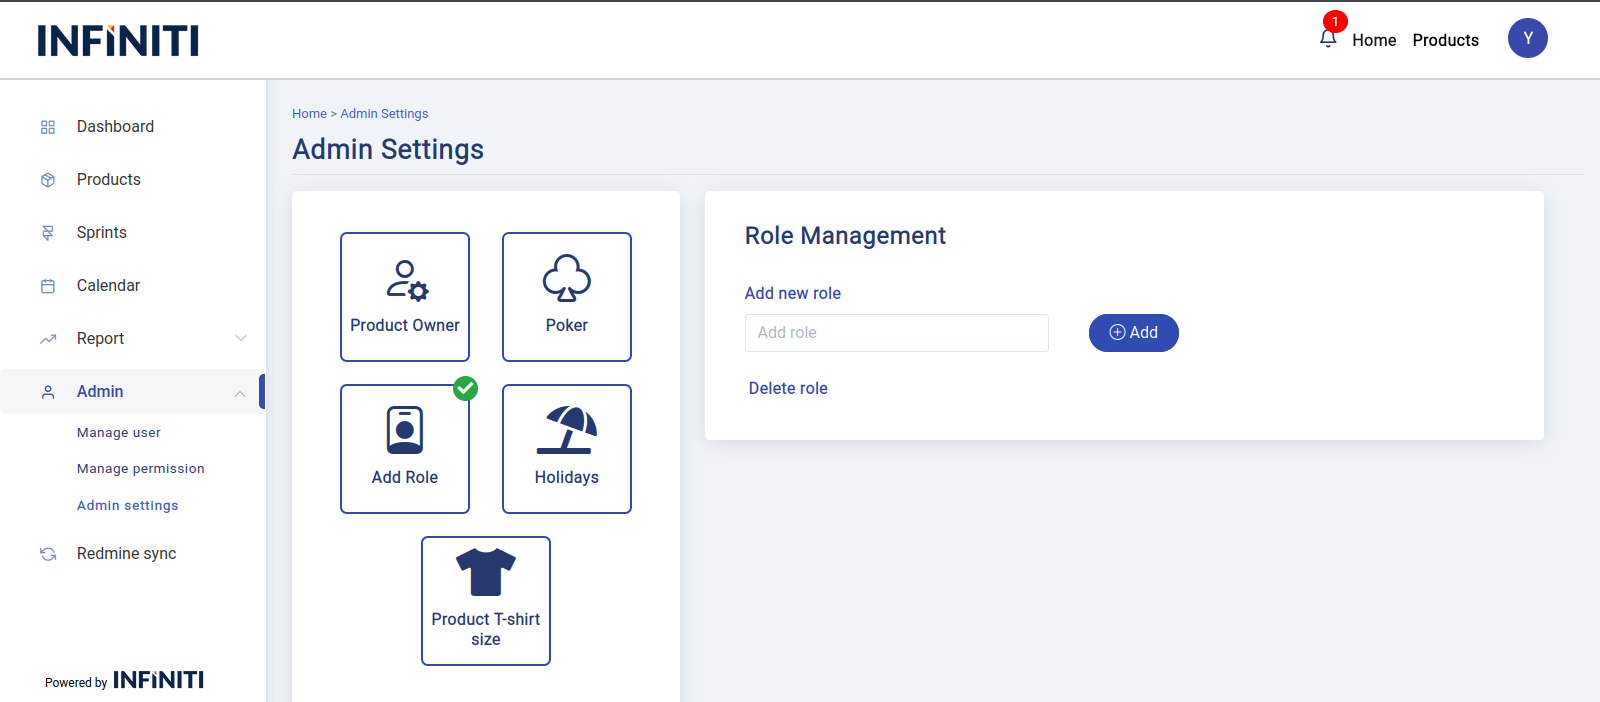
Functionality:
i. Input role name
- an input box where the administrator can type the name of a new role.
ii. Add role
- After entering the desired role name, click the “Add” button to save the new role into the system.
- Validation:
- The input field for the role name cannot be left empty. If the field is empty, the form will not be submitted, and an error message will prompt the administrator to fill in the role name.
- The role name must be unique; attempting to add a duplicate role name will result in an error.
Deleting a role page view
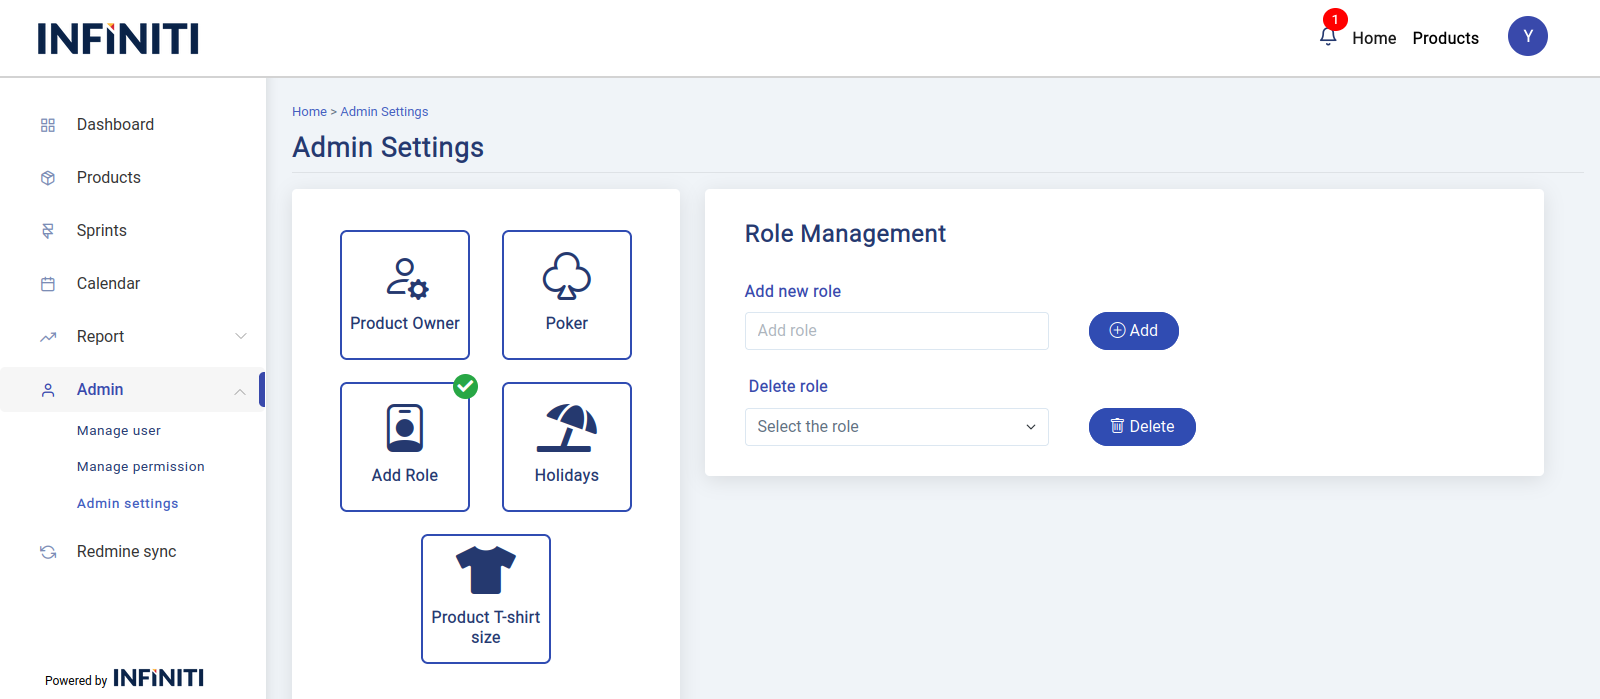
Functionality:
i. Initiate delete role
- At the bottom of the page, there is a “Delete Role” text. Clicking on this text will reveal a dropdown select box.
ii. Select role to delete
- Once the “Delete Role” text is clicked, the system fetches all existing roles from the database and populates them into the dropdown.
- The administrator can select a role from this dropdown to delete.
- Validation:
- A role must be selected from the dropdown to proceed with deletion. If no role is selected, the delete action will not be executed, and a prompt will indicate the need to choose a role.
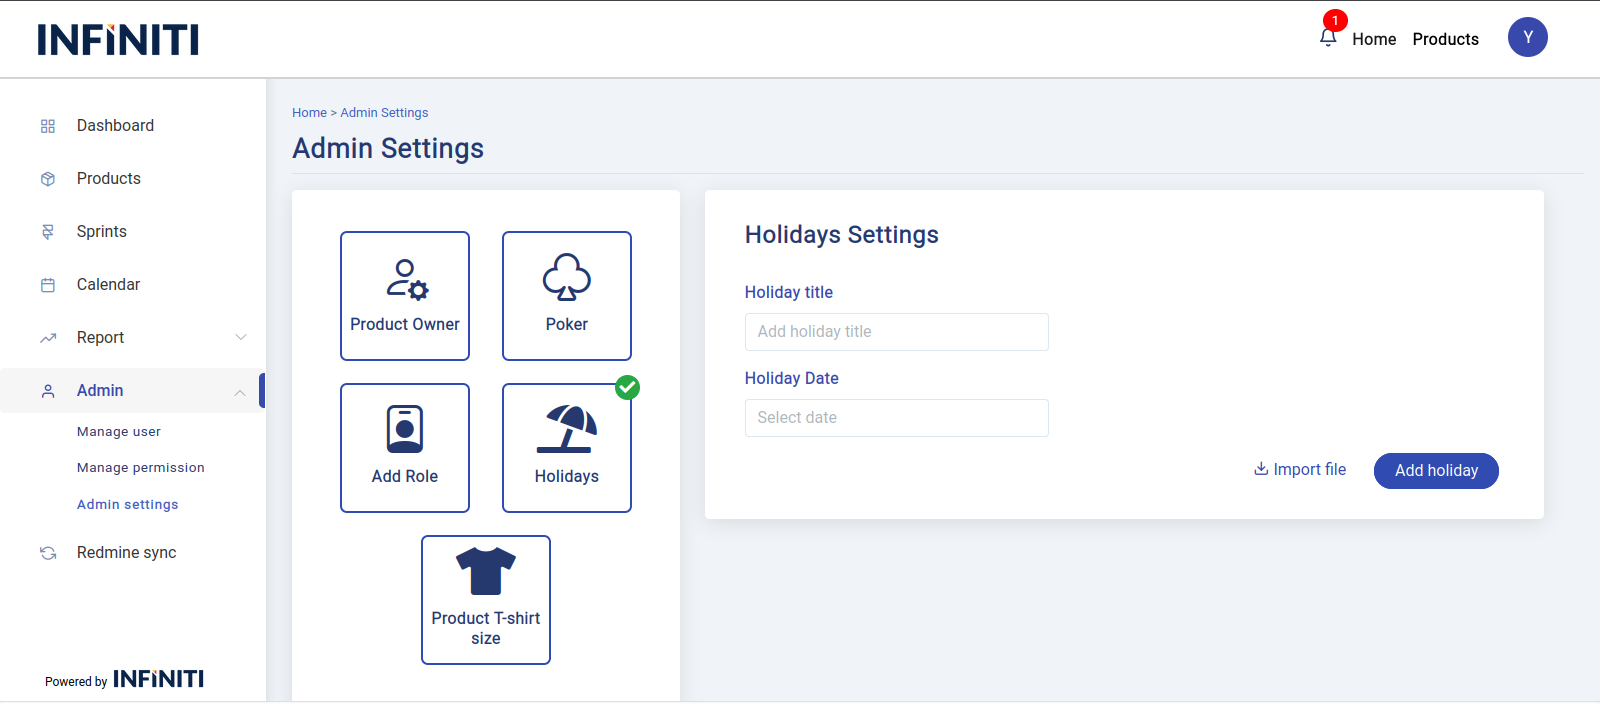
D) Manage holidays
- The Manage Holidays feature allows administrators to add holidays to the calendar either manually or by importing a file.
- This ensures that all relevant holidays are accurately reflected in the system’s calendar.
- This feature ensures that all users are aware of scheduled non-working days, enhancing planning and coordination.
Adding a holiday manually page view
Functionality:
i. Enter holiday details
- There are two input fields on the page:
- “Holiday Title” (text input) for the name of the holiday.
- “Holiday Date” (date input) for selecting the date of the holiday.
- There are two input fields on the page:
ii. Add holiday
- After filling in both fields, click the “Add Holiday” button to save the new holiday to the calendar.
- Validation:
- Both the “Holiday Title” and “Holiday Date” fields are mandatory. The form will not be submitted if either field is empty, and a prompt will appear to fill in the missing information.
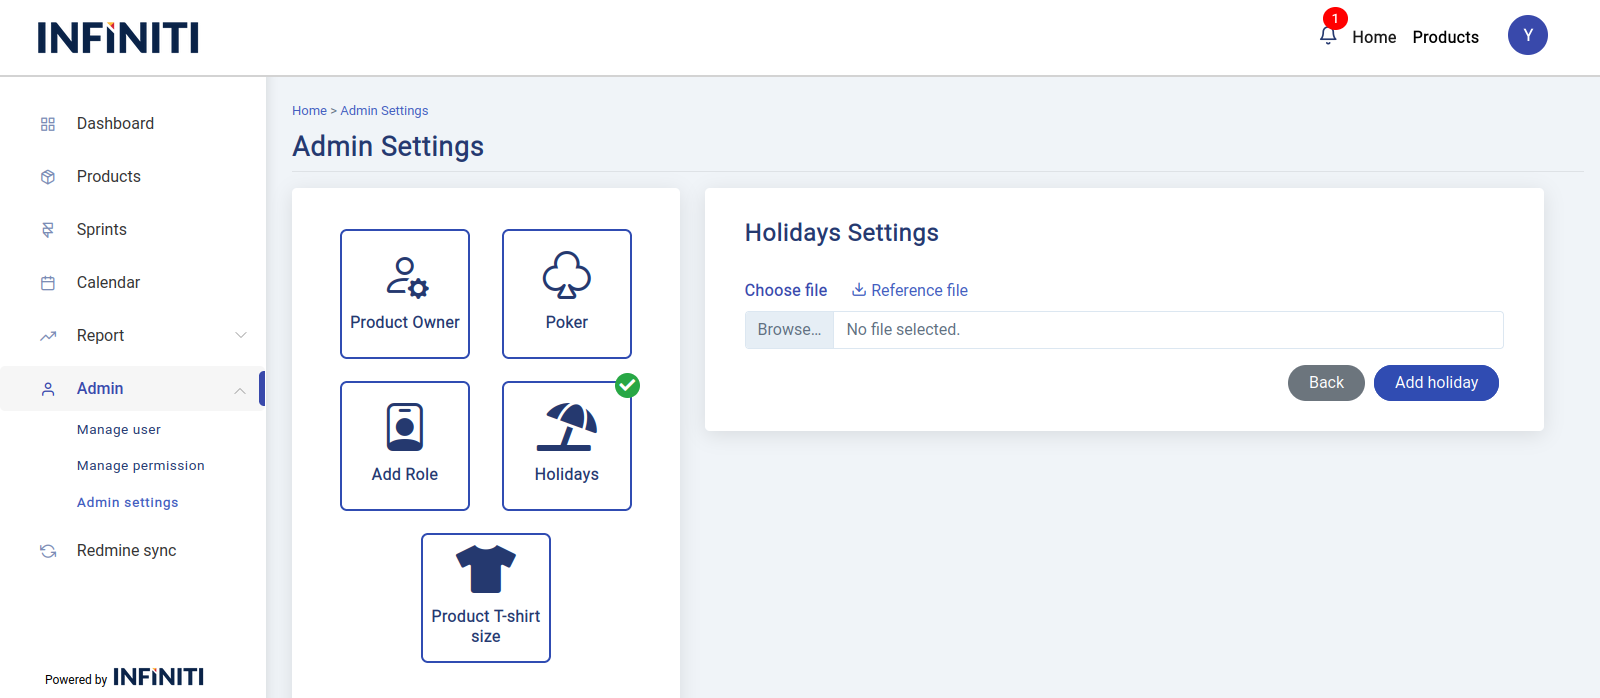
Importing holidays from a file page view
Functionality:
i. Initiate file import
- To import holidays from a file, click the “Import File” button. This action switches the interface to the file upload screen.
ii. Download sample file
- At the top of the new interface, there is a “Download Sample File” button. Clicking this will download a CSV file that can be used as a template for adding holidays.
- iii. Upload file
- Edit the downloaded sample CSV file to include the desired holidays, then upload it using the file upload option.
- Validation:
- The CSV file must be formatted correctly with valid holiday titles and dates.
- If the file contains any holidays that are already present in the system, the import process will throw an error indicating duplicate entries.
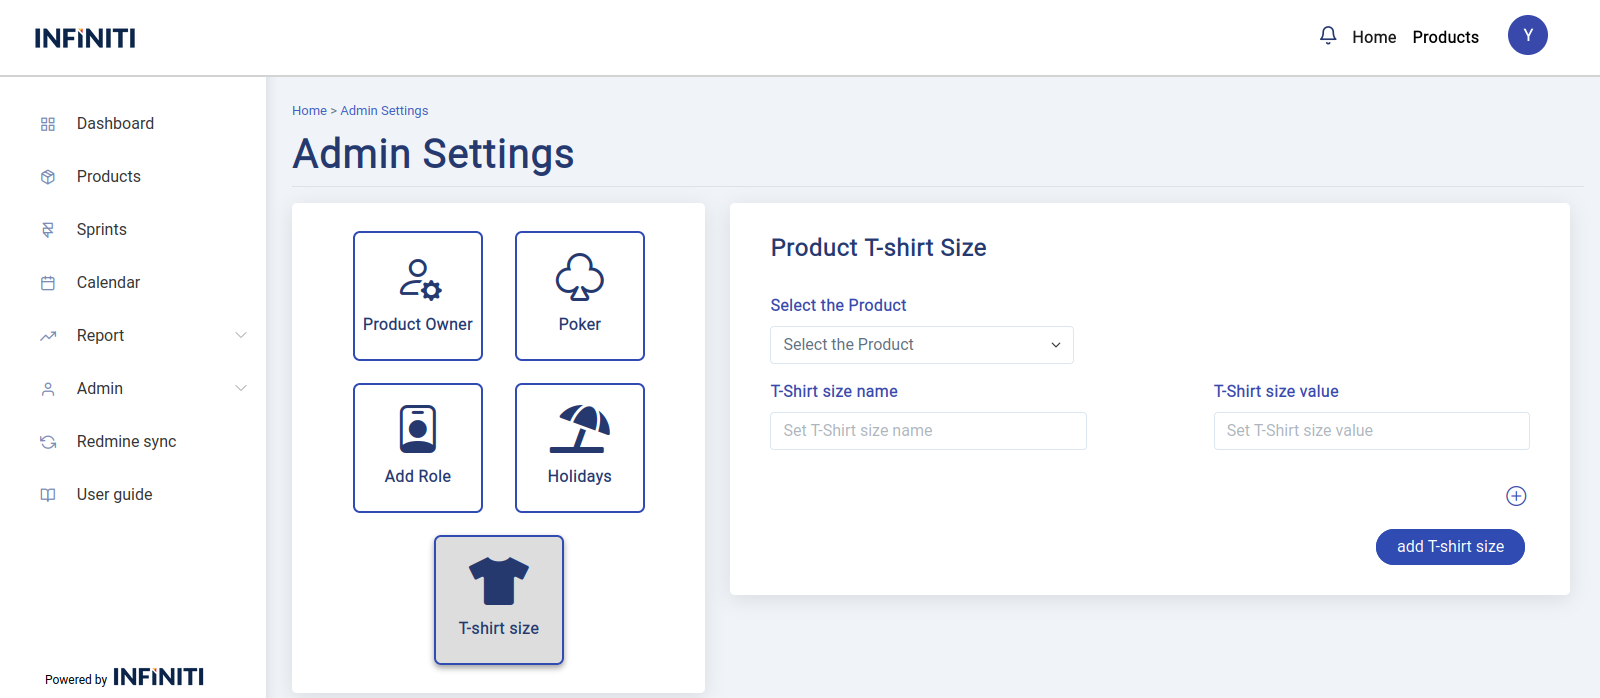
E) Product t-shirt size
- The Product T-shirt Size feature is used by administrators to categorize backlog items based on their importance.
- The T-shirt sizes represent different levels of priority, with larger sizes typically indicating more important items.
Product T-shirt size normal view
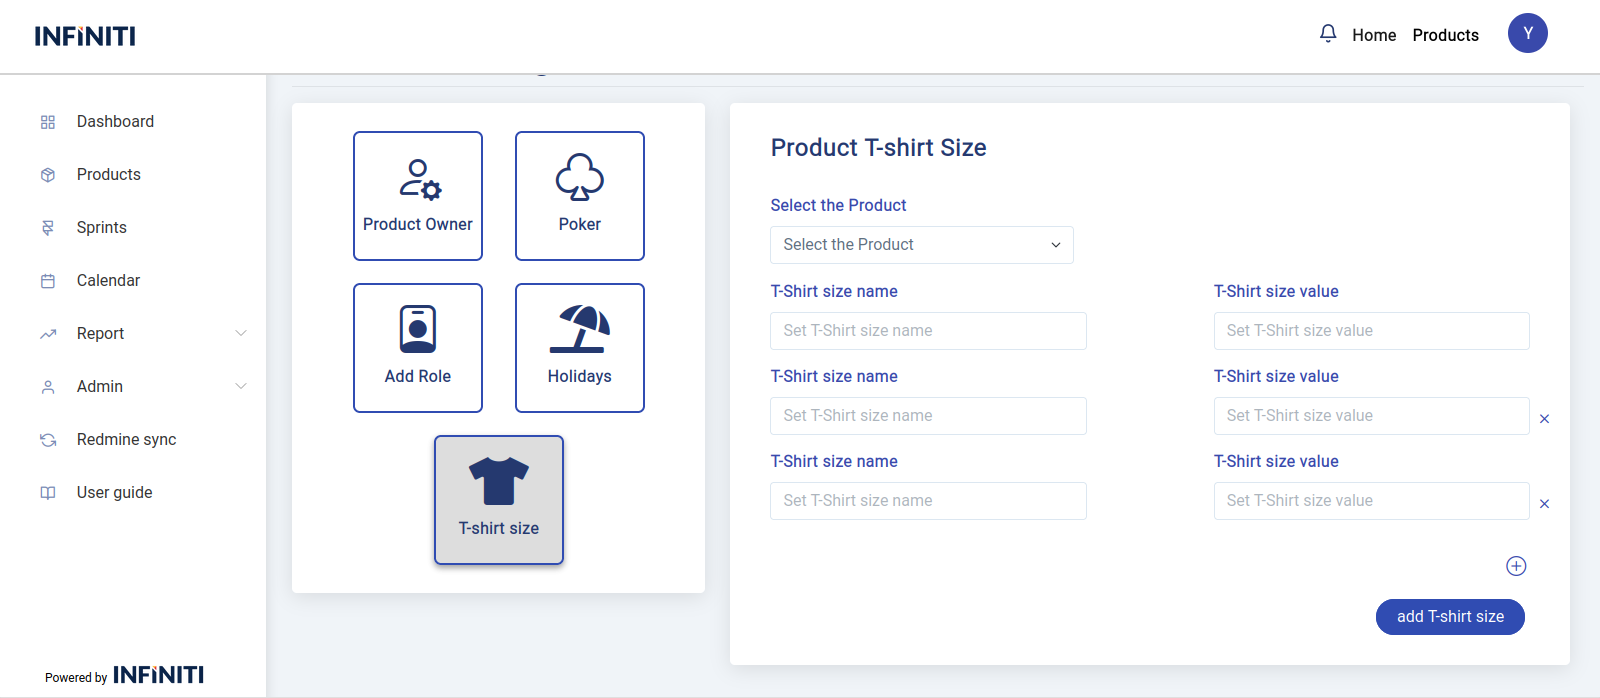
Product T-shirt size extended view
Functionality:
i. Select Product Dropdown
- This dropdown lists all products synced from the Redmine database.
- The administrator must select a product first , if already the T-shirt size are entered, once the product is selected it will automatically fetch the entered t-shirt size to view and edit or else the normal view will be displayed to enter the t-shirt size
ii. T-shirt Size Name and Value Input Fields
- After selecting a product, input fields appear to define the T-shirt size:
- T-shirt size name: Enter the name representing the size (e.g., Small, Medium, Large) to reflect how important the backlog item is.
- T-shirt size value: Enter a numerical value associated with the size to standardize the importance of the backlog item (e.g., 1-100 hrs, 100-300 hrs).
- After selecting a product, input fields appear to define the T-shirt size:
- iii. Add New T-shirt Size Button
- Clicking the “+” icon adds another set of input fields to define additional T-shirt sizes.
- Administrators can enter multiple sizes for the product by filling in the name and value fields.
- iv. Delete T-shirt Size
- Each T-shirt size entry has a small “X” icon next to it, which allows the administrator to remove that size if it is no longer needed.
- v. Add T-shirt Size Button
- Once all required sizes and values are entered, clicking the Add T-shirt Size button saves the size information for the selected product.
- The system will validate that both the name and value fields are filled before allowing submission.