1. Manage permissions page view
The Manage Permissions page provides administrators with the ability to control and customize user access within the system based on their roles. This page offers four main functionalities
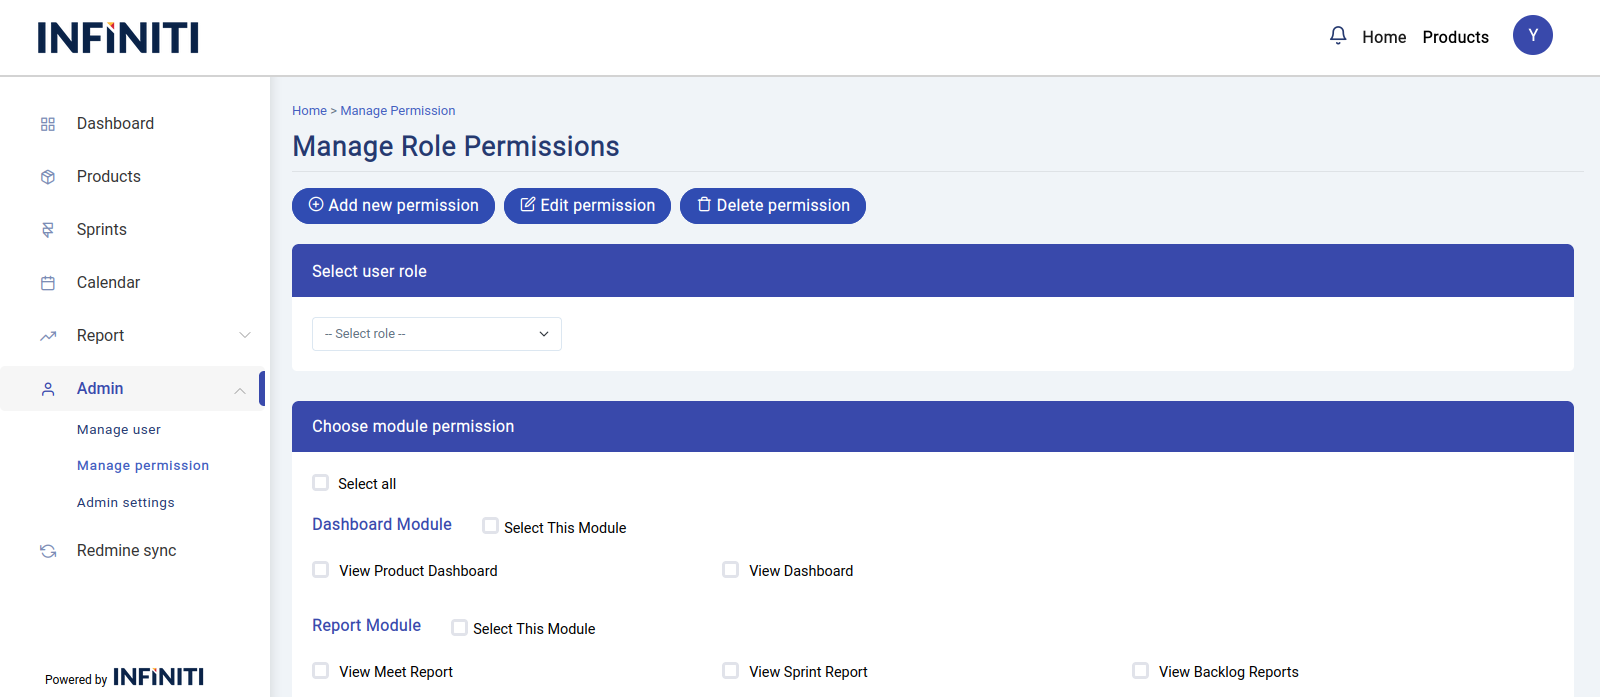
Functionality:
i. Set user permissions based on role
- Administrators can assign specific permissions to each user role.
- This feature allows for granular control over which functionalities and features each role can access within the system.
- Existing permissions are displayed, and administrators can easily modify them by selecting or deselecting check-boxes.
ii. Add new permissions
- As the system evolves, new features may require new permissions.
- Administrators can easily create new permissions by providing a name, selecting the relevant module, and specifying the URL route. This ensures that the system remains adaptable and secure as it grows.
iii. Edit existing permissions
- If there are any changes needed to existing permissions, such as updates to the permission name, associated module, or URL route, administrators can modify these details.
- This flexibility allows for ongoing adjustments to align with organizational needs and changes.
iv. Delete permissions
- When a permission is no longer required or relevant, administrators can remove it from the system.
- This helps in keeping the permissions list clean and relevant, ensuring that users only have access to the necessary functionalities.
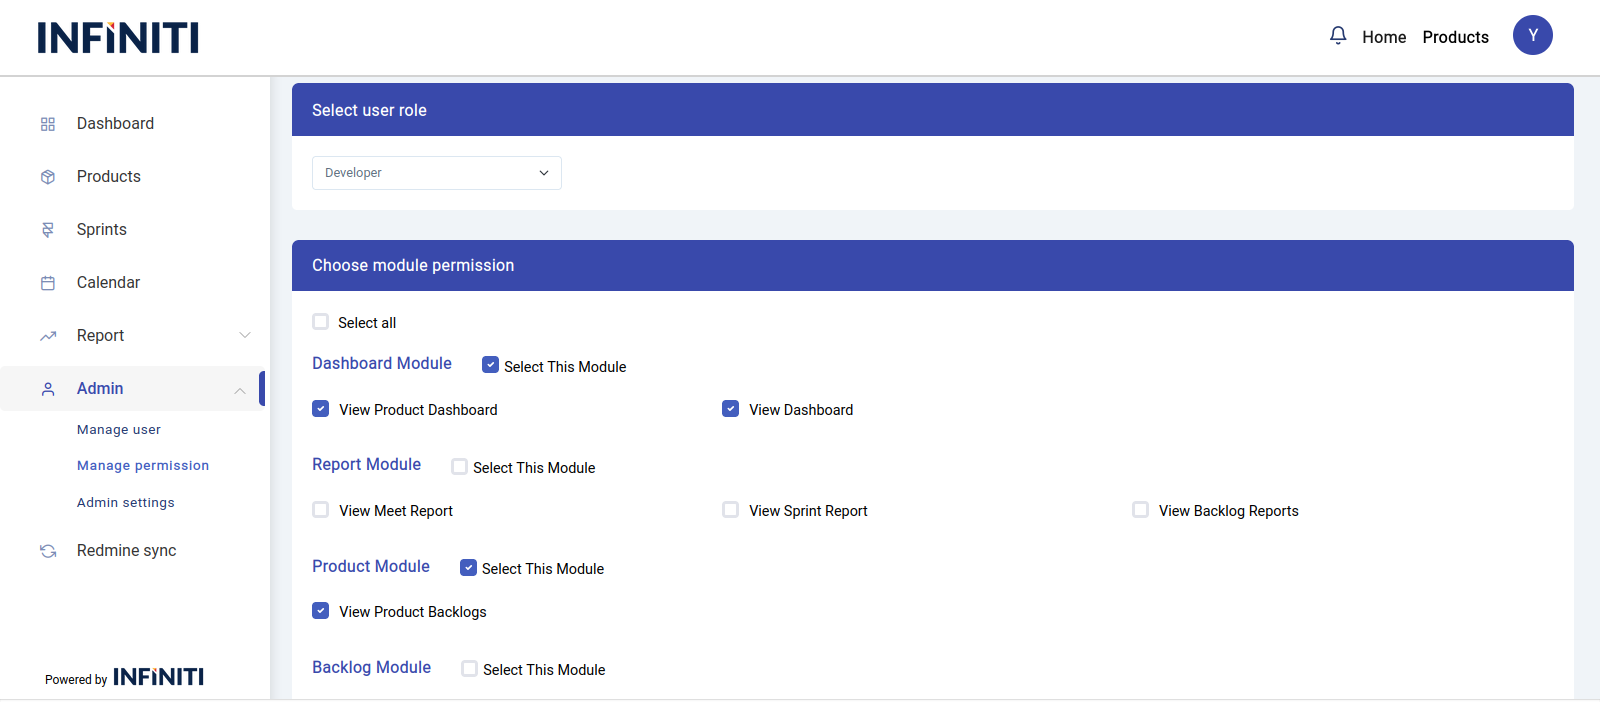
2. Setting permissions for roles
The Admin can set and modify permissions for each role, allowing precise control over what each user can access within the system.
Functionality:
i. Select role and view permissions
- The Admin selects a role from the drop down list. If the selected role already has assigned permissions, the corresponding check-boxes will be automatically selected to reflect those permissions.
ii. No existing permissions
- If the selected role does not have any permissions assigned, none of the check-boxes will be marked.
iii. Add or remove permissions
- The Admin can add additional permissions by selecting the appropriate check-boxes or remove existing permissions by unchecking them. After making changes, the Admin must save the form to apply the updates.
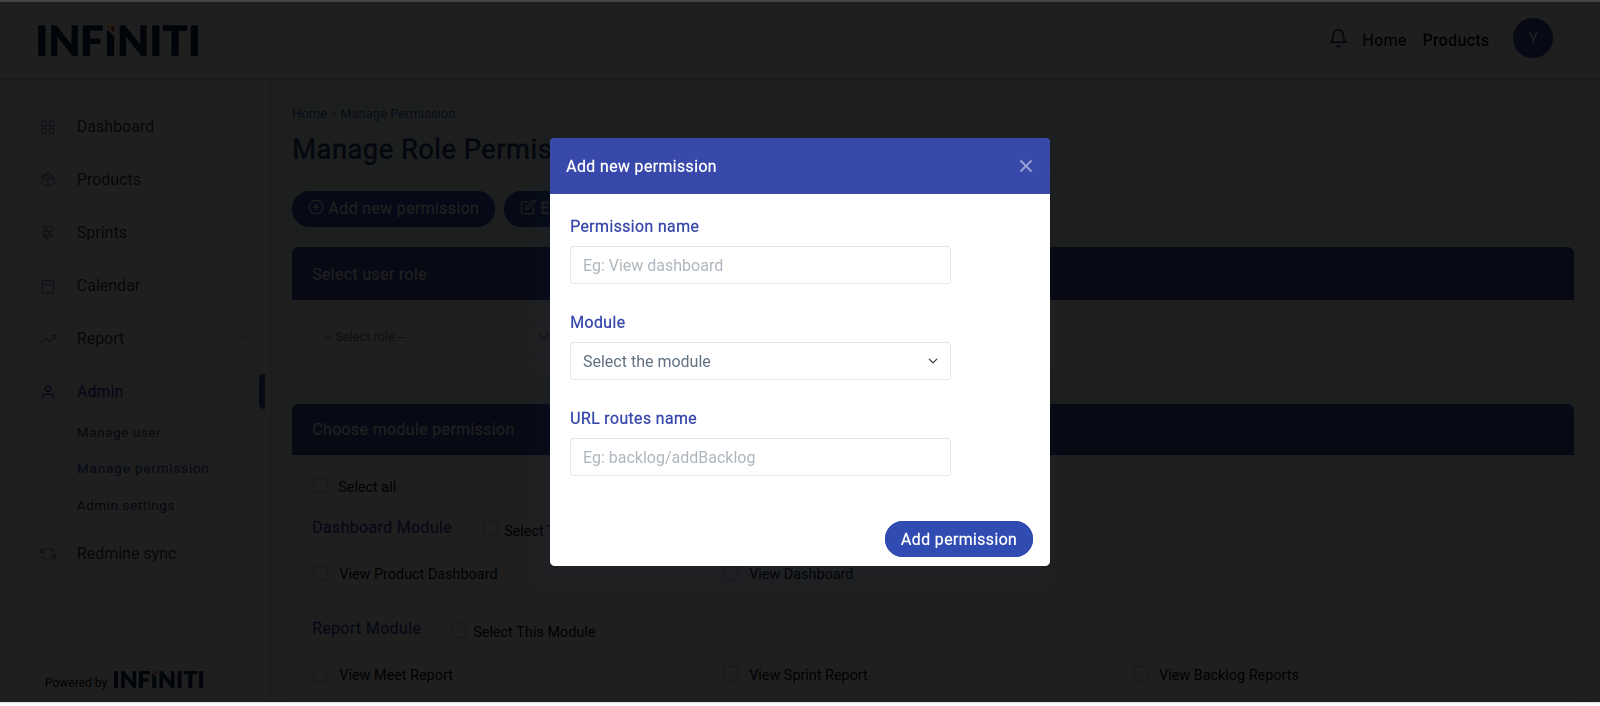
3. Adding new permissions
The tool allows for future expansion by enabling Admins to add new permissions as new features are integrated.
Functionality:
i. Adding new permissions
- The Admin can add a new permission by providing a permission name, selecting the appropriate module, and specifying the URL route where the permission applies.
- For example,
- A permission name could be “Add Poker Points.”
- Module Could be “User strories”
- URL routes like “backlog/pokerPoints”
ii. URL specification
- Providing a valid URL ensures that the access control list (ACL) functions correctly based on the specified route.
Validation:
i. Required fields
- The form requires all fields to be completed :
- Permission Name: Must be a string (varchar) up to 50 characters.
- Module: Must select a module while submitting.
- URL Route Name: Must be a string (varchar) up to 100 characters.
- The form requires all fields to be completed :
ii. Form submission
- The form cannot be submitted unless all required fields are completed. If any field is left blank, a validation error will be triggered, prompting the Admin to fill in the missing information.
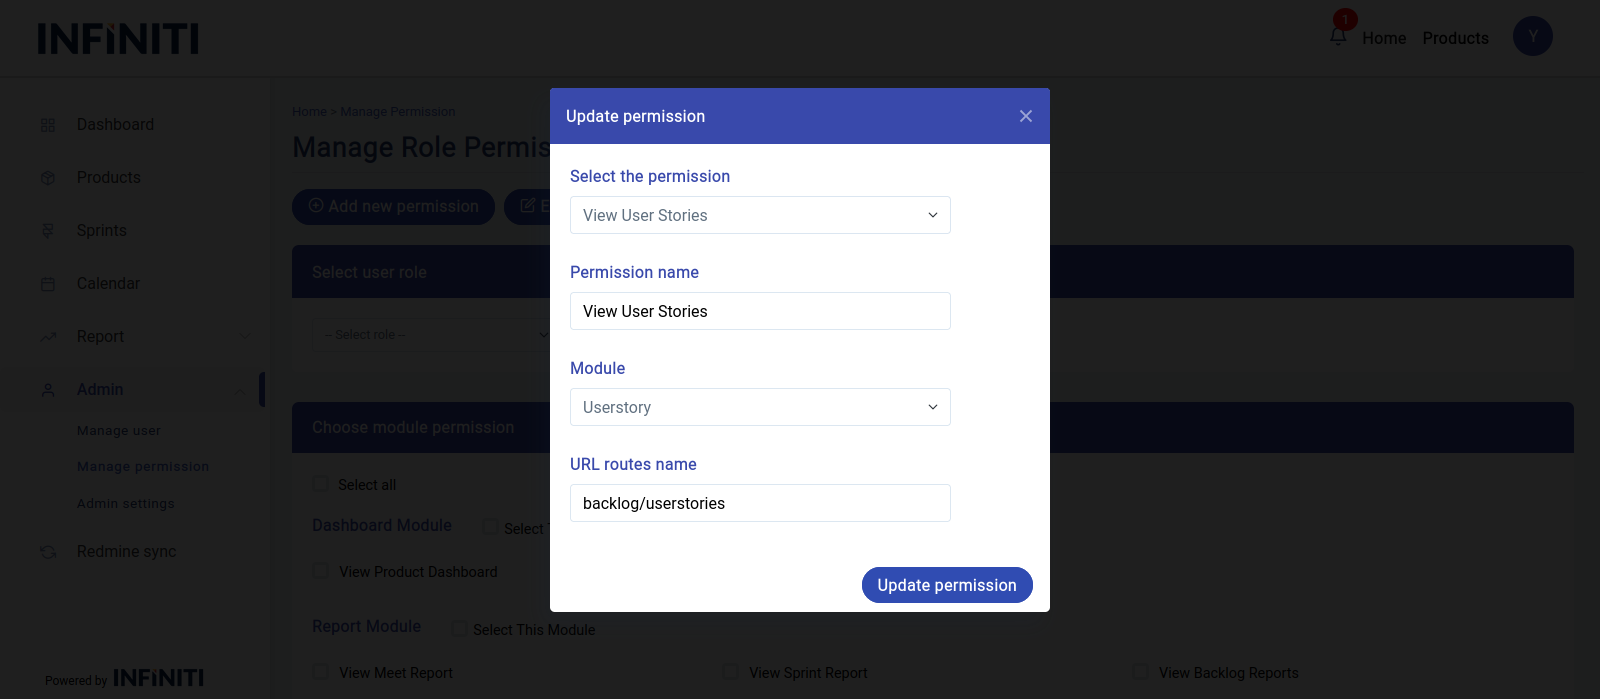
3. Editing existing permissions
Admins can edit existing permissions if there are errors or changes needed in the permission name, module, or URL.
Functionality:
i. Edit permission details
- By clicking the “Edit Permission” button, a modal window opens displaying a dropdown of all existing permissions fetched from the database.
ii. Auto-populate fields
- When a permission is selected from the dropdown, its current details (permission name, module, and URL) are auto-populated in the respective fields, allowing for easy modification.
iii. Save changes
- After making the necessary changes, the Admin can submit the form to update the permission details.
Validation:
i. Required selection
- The Admin must select a permission from the dropdown to edit it.
ii. Required fields
- The form cannot be submitted unless all required fields are completed. If any field is left blank, a validation error will be triggered, prompting the Admin to fill in the missing information.
4. Deleting existing permissions
If a permission is no longer needed, the Admin can remove it from the system.
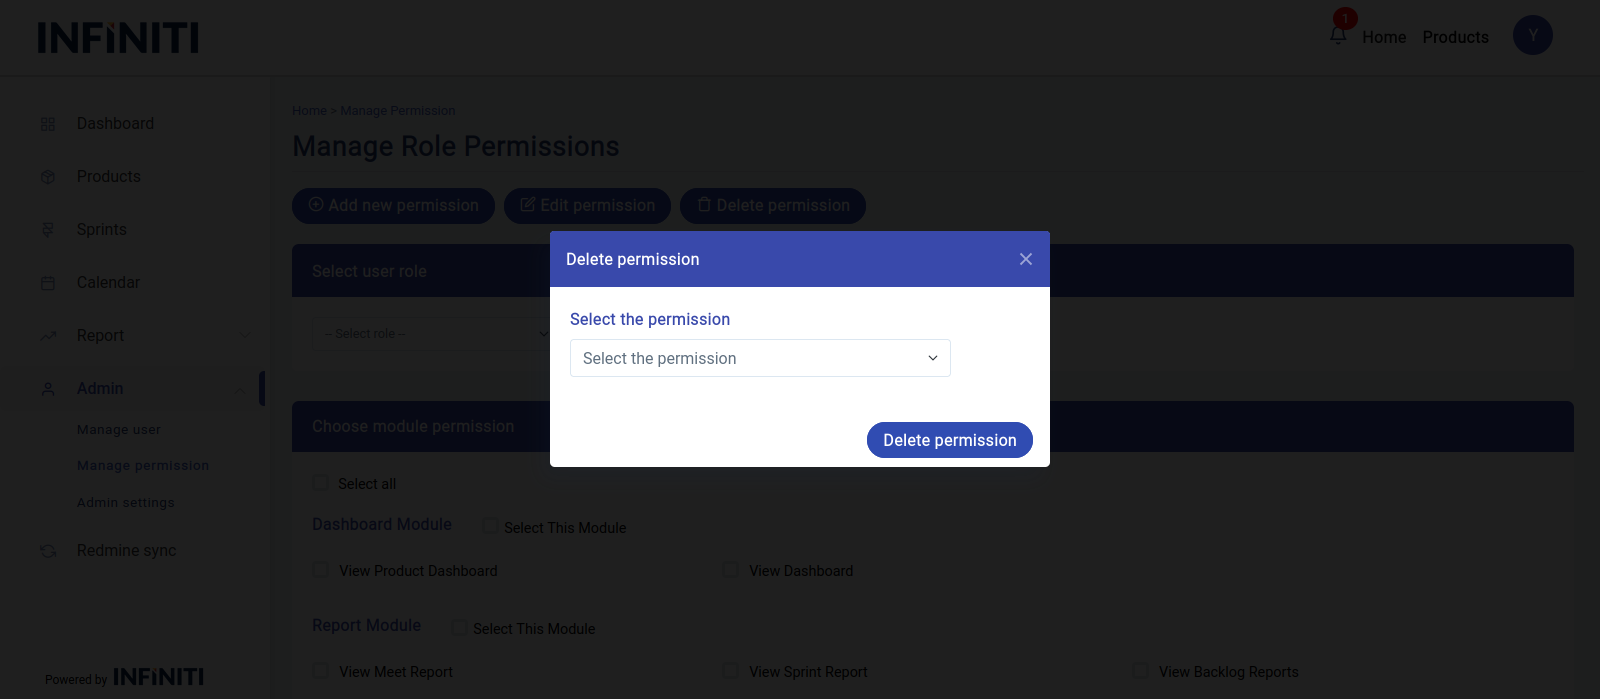
Functionality:
i. Delete permission
- To delete a permission, the Admin clicks the “Delete Permission” button. A dropdown list of all permissions is displayed, fetched from the database.
ii. Select and delete
- The Admin selects the permission to be deleted from the dropdown and confirms the deletion.
Validation:
i. Required selection
- The form cannot be submitted without selecting a permission to delete.